Spring Nest Cookies with Chocolate Eggs
-
 I’m not too into froof when it comes to baking, but even I said “awww” when I made these sugar cookie nests.
Flashback to a year ago when wandering aimlessly through Williams Sonoma- I stumbled upon a book called “The Art of the Cookie” with pictures of these- and knew I had to purchase the potato ricer required to push the cookie dough through to get the funky little nest-like pieces. (Basically a play-doh tool for grown ups.) So I have had the potato ricer in the cupboard for a year now (which makes dramatically better mashed potatoes, by the way), the time had come to make the nests. It’s spring, and Cadbury Mini Eggs are everywhere. They deserve a home, resting securely in a sugar cookie nest with the help of a simple icing. And these cookies deserve a home, too… in your mouth, hungry baker.
Adapted from “The Art of the Cookie” recipe…
2 3/4 cups all purpose flour
1 teaspoon baking powder
3/4 teaspoon salt
1/4 teaspoon baking soda
3/4 cup plus two tablespoons unsalted butter, room temperature
1 cup brown sugar, firmly packed
1 large egg
1 tablespoon molasses
1 tablespoon heavy cream
1/2 teaspoon vanilla
1 cup confectioners’ sugar
1 tablespoon milk or cream
Cadbury Mini Eggs (or any other cute chocolate egg you can find)
- In a medium bowl, whisk together the flour, baking powder, salt, and baking soda- set aside.
 Beat the butter and sugar until light, about 2-3 minutes. Add the egg, molasses, cream and vanilla and beat until combined. Add the flour mixture in two parts and continue to beat until just blended together into a dough. (If the dough seems too dry, add another tablespoon of cream and mix just until combined.) Try not to over mix the dough- you just want the wet & dry ingredients incorporated into a smooth, pliable dough.
- Plop the dough onto a sheet of plastic wrap and form it into a disk about 1 inch thick, and refrigerate for at least an hour (or freeze for 20 – 30 if you are impatient).
- Preheat oven to 350˚ and line 2 baking sheets with parchment paper.
 Scoop about 1/2 cup of dough in the potato ricer and squeeze like there’s no tomorrow (it will require strength but you have it inside of you- all for the love of a cute cookie). Squeeze out about an inch or so of dough, and use a paring knife to scrape the nest pieces from the ricer. Carefully mound clumps of dough into nest shapes (I prefer to keep the edges rustic instead of well-formed) and place an indentation in the center (for the eggs to sit in after baked). Chill the baking sheet of nests for at least 15 minutes.
- Bake about 10 minutes, until cookies are golden brown just around the edges but the tops are still the same color, about 10-13 minutes. Transfer to a rack to cool before placing eggs in nests.
- Make the icing to secure the eggs by stirring confectioners’ sugar and milk together. Dab a small amount on the bottom of each egg (like glue) and adhere to the nests.
Tips:
- Chill out. Let the nests get firm before baking- promise that you won’t skip this step. (Unless you want nests that spread out when they bake.)
 Any alternative to the potato ricer? No, I don’t think so. It’s hard work (I asked The Husband for help, and even he complained), but you’ll do this what- once a year? (I wonder if you could grate the dough if it’s really chilled & hard… if you try this, let me know.)
- Molasses isn’t for everyone, so if you’d like, sub in more cream instead. (You don’t taste it in a big way for these cookies, by the way- just a subtle note.)
- Had enough of the nests? Yes, I only made a dozen or so, too. I used the rest of the batter and put in a tart pan, and baked for 20 minutes… then sliced. Way faster. Not festive, but still.
Related Recipes & Posts:
Leave a Reply

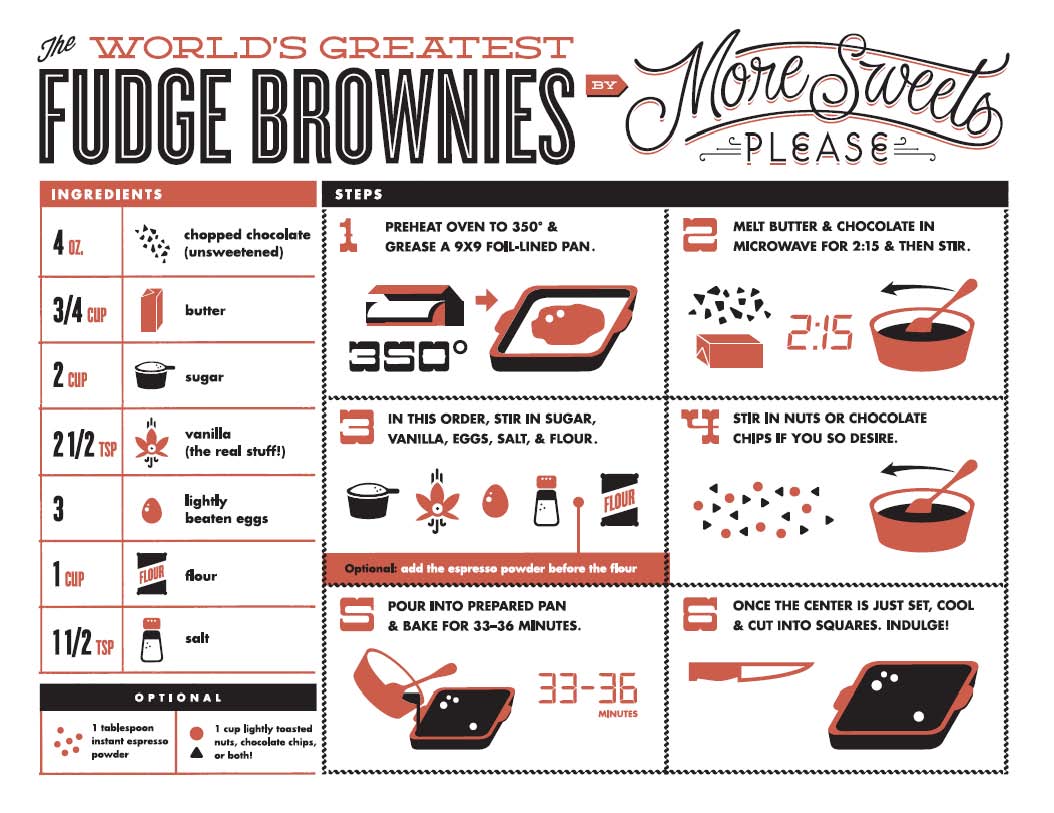
World’s Greatest Brownie Apron- Buy Me Instantly!

More Sweets, Please!

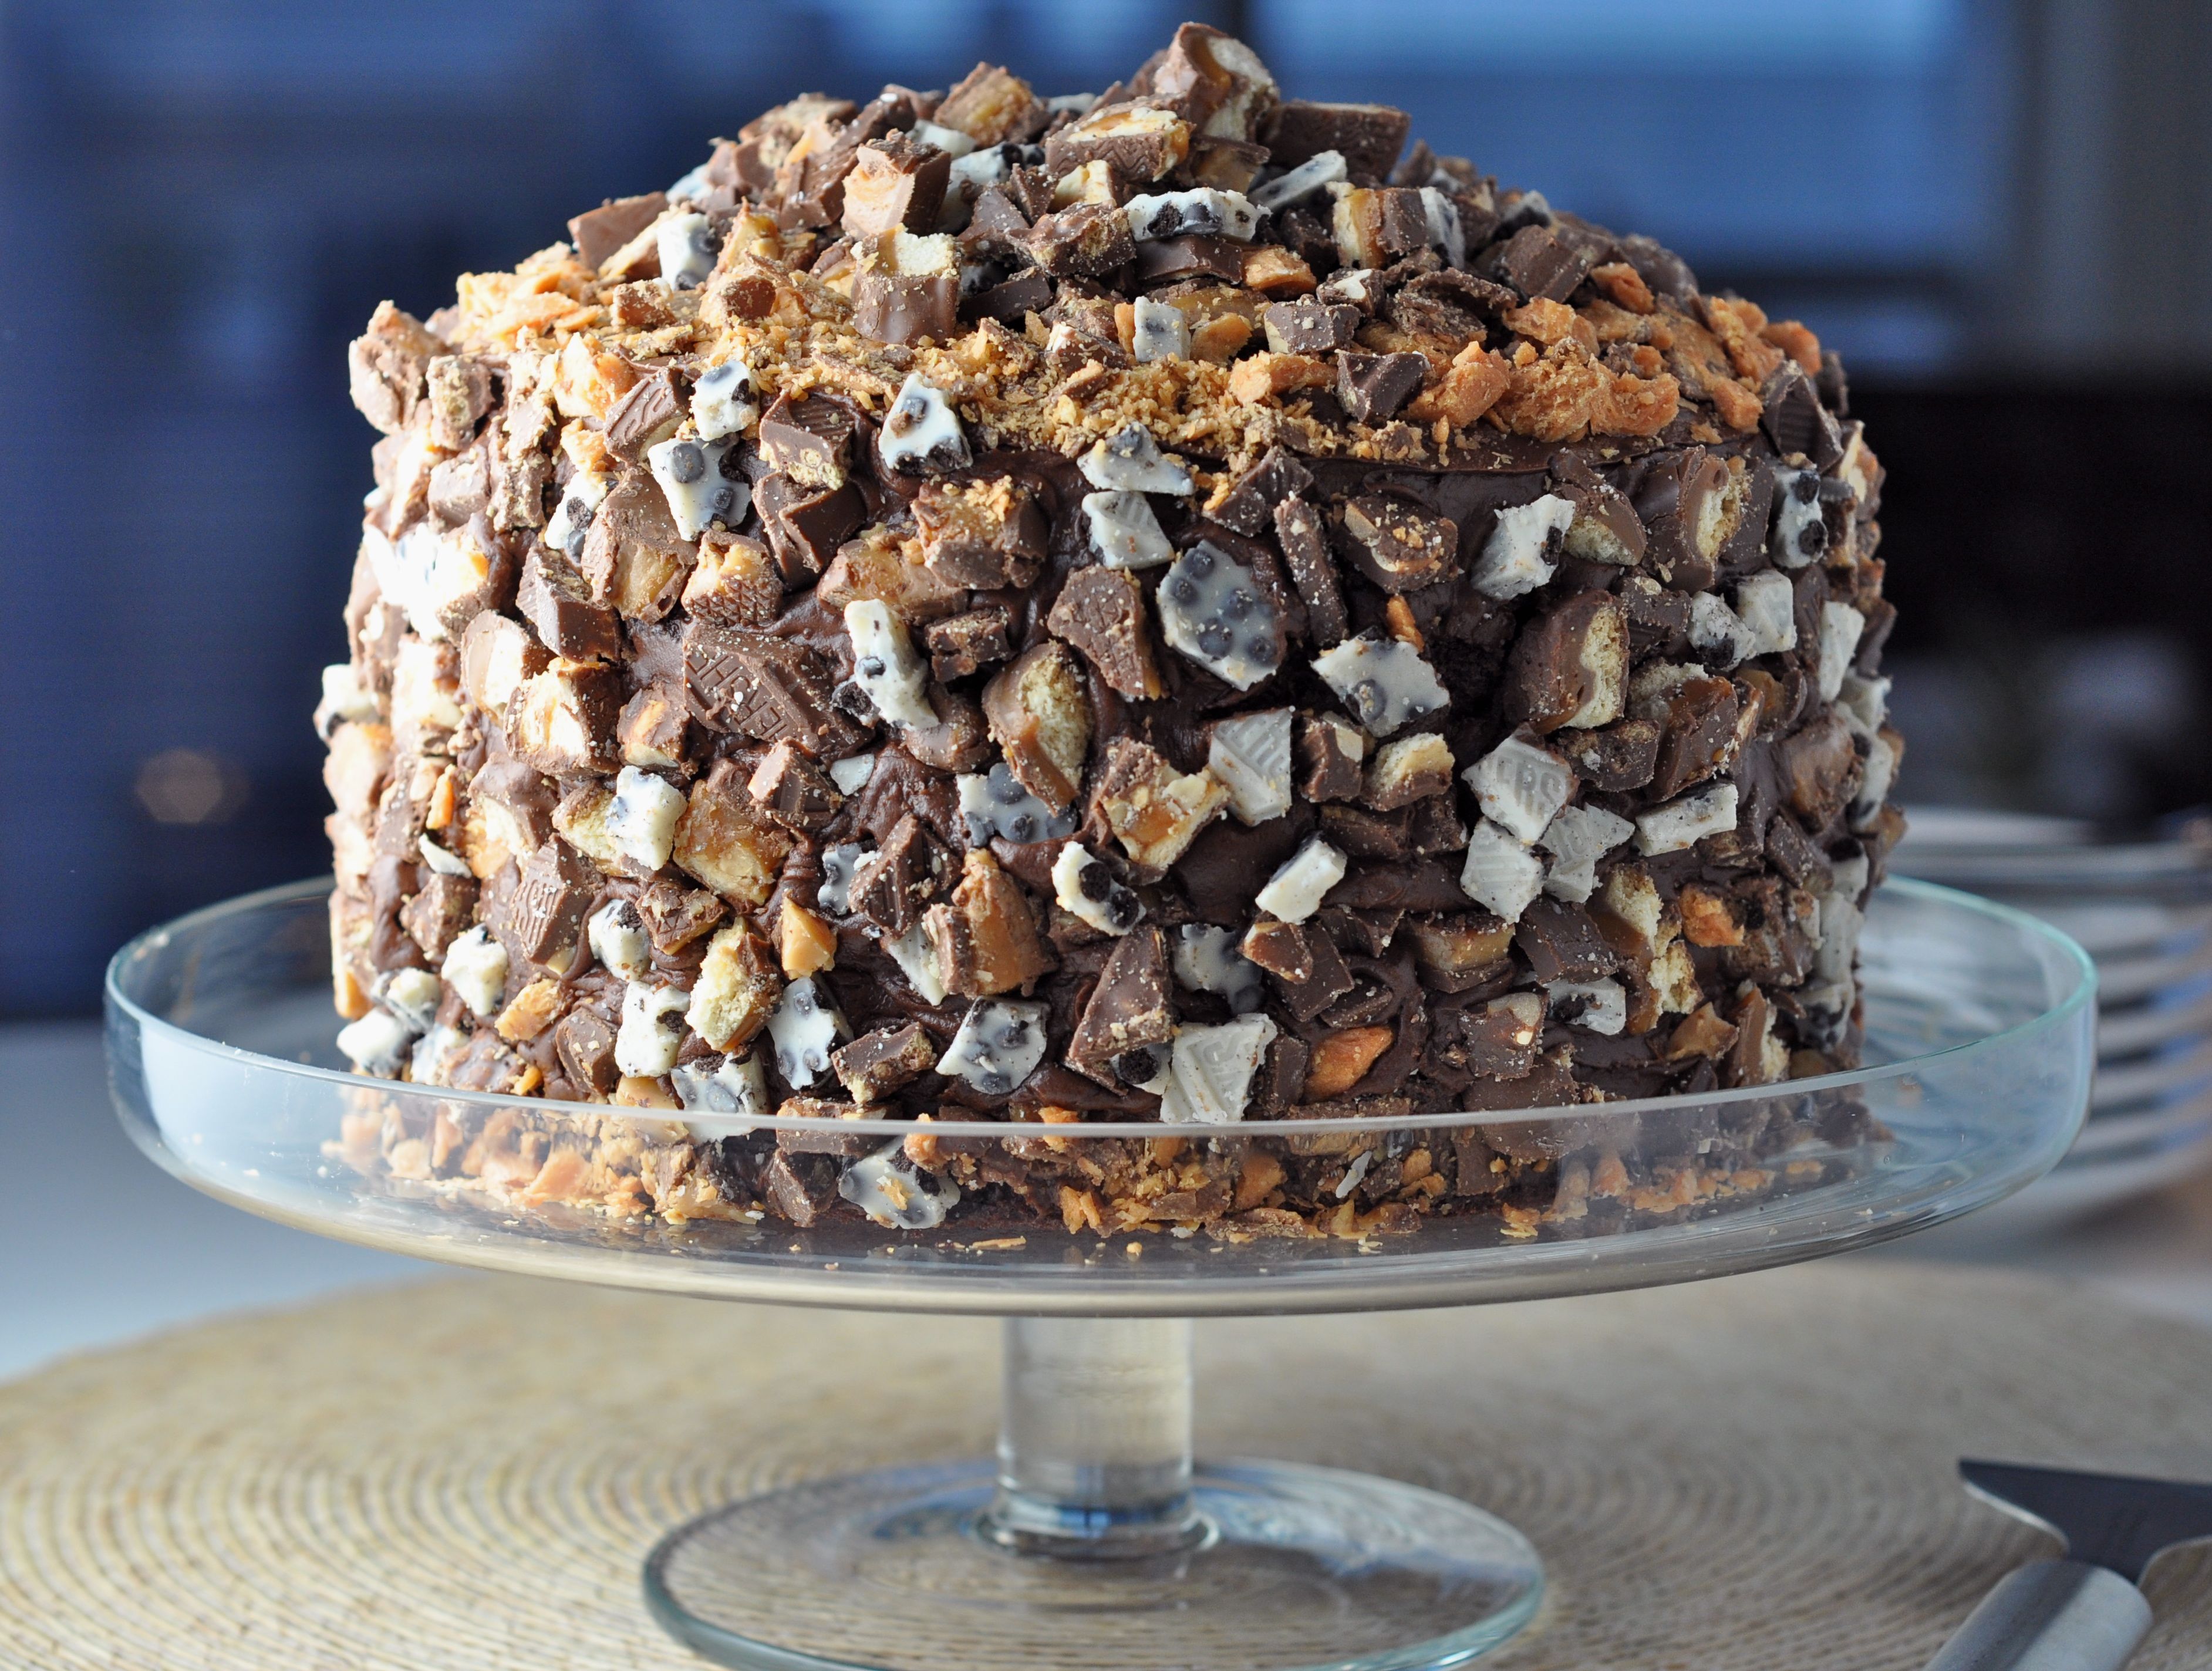
This Cake is Not a Mirage.
World’s Greatest Brownie Kitchen Towel for Purchase!


The Bingeworthy Brownie…