Gooey Nut Bars
-

Dear Lord.
I have a lot of things to be thankful for in life, and this dessert is definitely one of them.
That might sound blasphemous but I really mean it.
It’s the goo in this recipe that makes it so… holy. (Okay, I’m going to quit the whole religious parallel because it’s getting weird.)
Back to the goo.
I have always been a fan of the goo, as made evident in the diatribe found on my Decadent Deep-Dish Pecan Pie post (who else would make a Pecanless Pecan Pie, just to celebrate the goo?).Goo science lesson: goo is usually achieved with the help of corn syrup (or Golden Syrup if you’re a UKer), which is a lovely thing… but a bit debate-worthy for those that object to the somewhat processed nature of the corn into syrup and such. So why not make goo in the most natural way possible? That is, from cream (heavy cream- not for the faint of heart), butter (still not for the faint of heart), sugar (yep, same point), honey (oh dear), and a bit of bourbon (don’t say I didn’t warn you).

Goo gawking: see the way the goo kind of crawls up on the edge pieces in the picture to the right? It’s goo gone wild… baked into a chewy goo. (Technically no longer goo, but goo nonetheless.) I have to say that the pictures don’t give the depth of goo their day in the sun- they don’t make it clear that the recipe is really quite goo-centered and that these bars have a really rich layer of caramelly goodness. As always, bake your bars for a bit less time if you like to see your goo ooze involuntarily (rather than simply squish out the sides of the square when bitten into or stabbed with a fork.)
With all this talk about goo, I haven’t done justice to the crust as of yet- so let me give it a bit of air time. I have always believed that the medley of sugar, butter and flour (oh, with some salt- never forget the salt) is a recipe for success. Sometimes it takes work, though (a turn off, I know). But this crust is meant for people who don’t love to roll out dough. It’s meant for people who are skilled at pressing things into the bottom of pans (something anyone with gross motor skills can do).
Praise be to the Gooey Nut Bar. (Especially with chocolate on top. Just a hint, though.)
Recipe adapted from the Food Vagabond version…
CRUST:
1 1/3 cups all purpose flour
1/2 cup light brown sugar, packed
1/2 cup/1 stick butter, very cold & cut into pieces
1/4 teaspoon salt
2 teaspoons cold milk (or cold water)
GOOEY FILLING:
3/4 cup pecans, toasted & coarsely chopped
3/4 cup walnuts, toasted & coarsely chopped
1 cup heavy cream
1/2 cup sugar
1/3 cup light brown sugar, packed
3 tablespoons honey (or agave syrup)
3 tablespoons butter
2 tablespoons bourbon whiskey (or vanilla)
2 teaspoons orange zest
1 teaspoon salt
TOPPING:
3/4 cup bittersweet or dark chocolate chips
- Preheat oven to 350°. Line a 9 x 9″ baking pan with foil and grease it lightly with butter or baking spray.
- CRUST: Combine all ingredients for the crust in a food processor (or use a pastry cutter to work the butter into crumbs if you must- sorry) until small crumbs are formed. Drizzle milk/water over dough and process until it just starts to come together; it will be very crumbly and you will worry how it will actually work. Press with your fingers evenly into the bottom of the prepared baking pan. Bake for 15 minutes, or until lightly golden.
- GOOEY FILLING: While the crust bakes, prepare the filling. In a large saucepan, combine all filling ingredients (EXCEPT for the nuts) and bring to a boil over medium heat (expect a lot of bubbling). Allow mixture to boil for 5 minutes, stirring periodically while the goo thickens slightly.
- Spread the nuts evenly across the bottom of the pre-baked crust. Pour the hot filling evenly over the nuts and base (the nuts will rise to the top of the goo).
- Bake for 20 – 25 minutes, until the filling looks thick (mostly set but still jiggly in the middle) and dark golden-brownish.
- CHOCOLATE TOPPING: Immediately after removing the baking pan from the oven, sprinkle the chocolate chips/ pieces evenly over the bars. Allow to sit for a few minutes to melt, and use an offset spatula (or any spatula, or the back of a spoon) to gently spread the chocolate in a thin layer. Be careful not to mix it with the still-setting-goo too much. Transfer to a cooling rack, and chill in the fridge to set (and make slicing easier).
- Enjoy!
Tips:
- Nut choices are SO open for interpretation. You can do all walnuts, or all pecans, or even all almonds- or whatever. It’s up to you. Toast them lightly before adding to the recipe… for about 8 minutes on a baking tray in a hot oven. (You can skip this step if you’re feeling particularly lazy.)
- Feel like a pie instead? Do it! Just make sure you put the pie plate over a baking pan to catch the bubbling up goo that will likely spill over the edges. (Use a deep-dish pie plate if possible to prevent this.)
- The chocolate will crackle when you cut it, just so you know. I use a hot knife to try and prevent this from happening, and I suppose I could cut the bars while they are still soft. We’ll see next time.
- Killer quote: “These are amazing.” (An unsolicited comment from The Husband, said in a serious voice.)
Related Recipes & Posts:
Leave a Reply

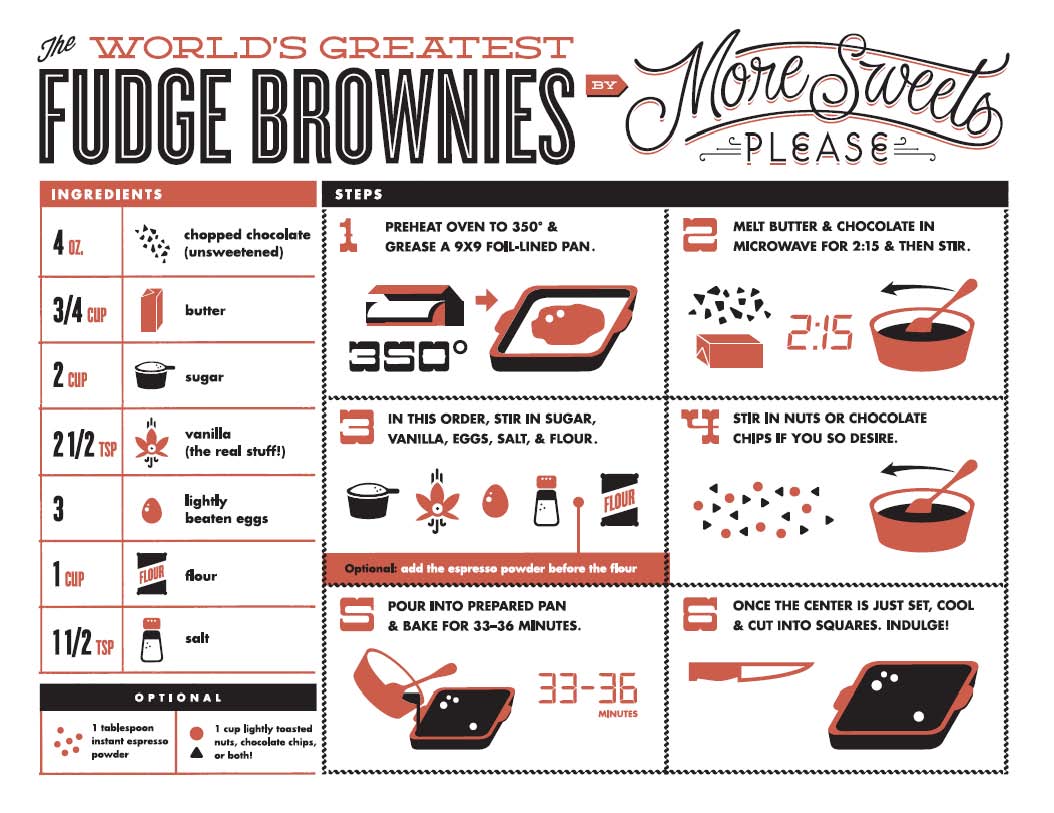
World’s Greatest Brownie Apron- Buy Me Instantly!

More Sweets, Please!
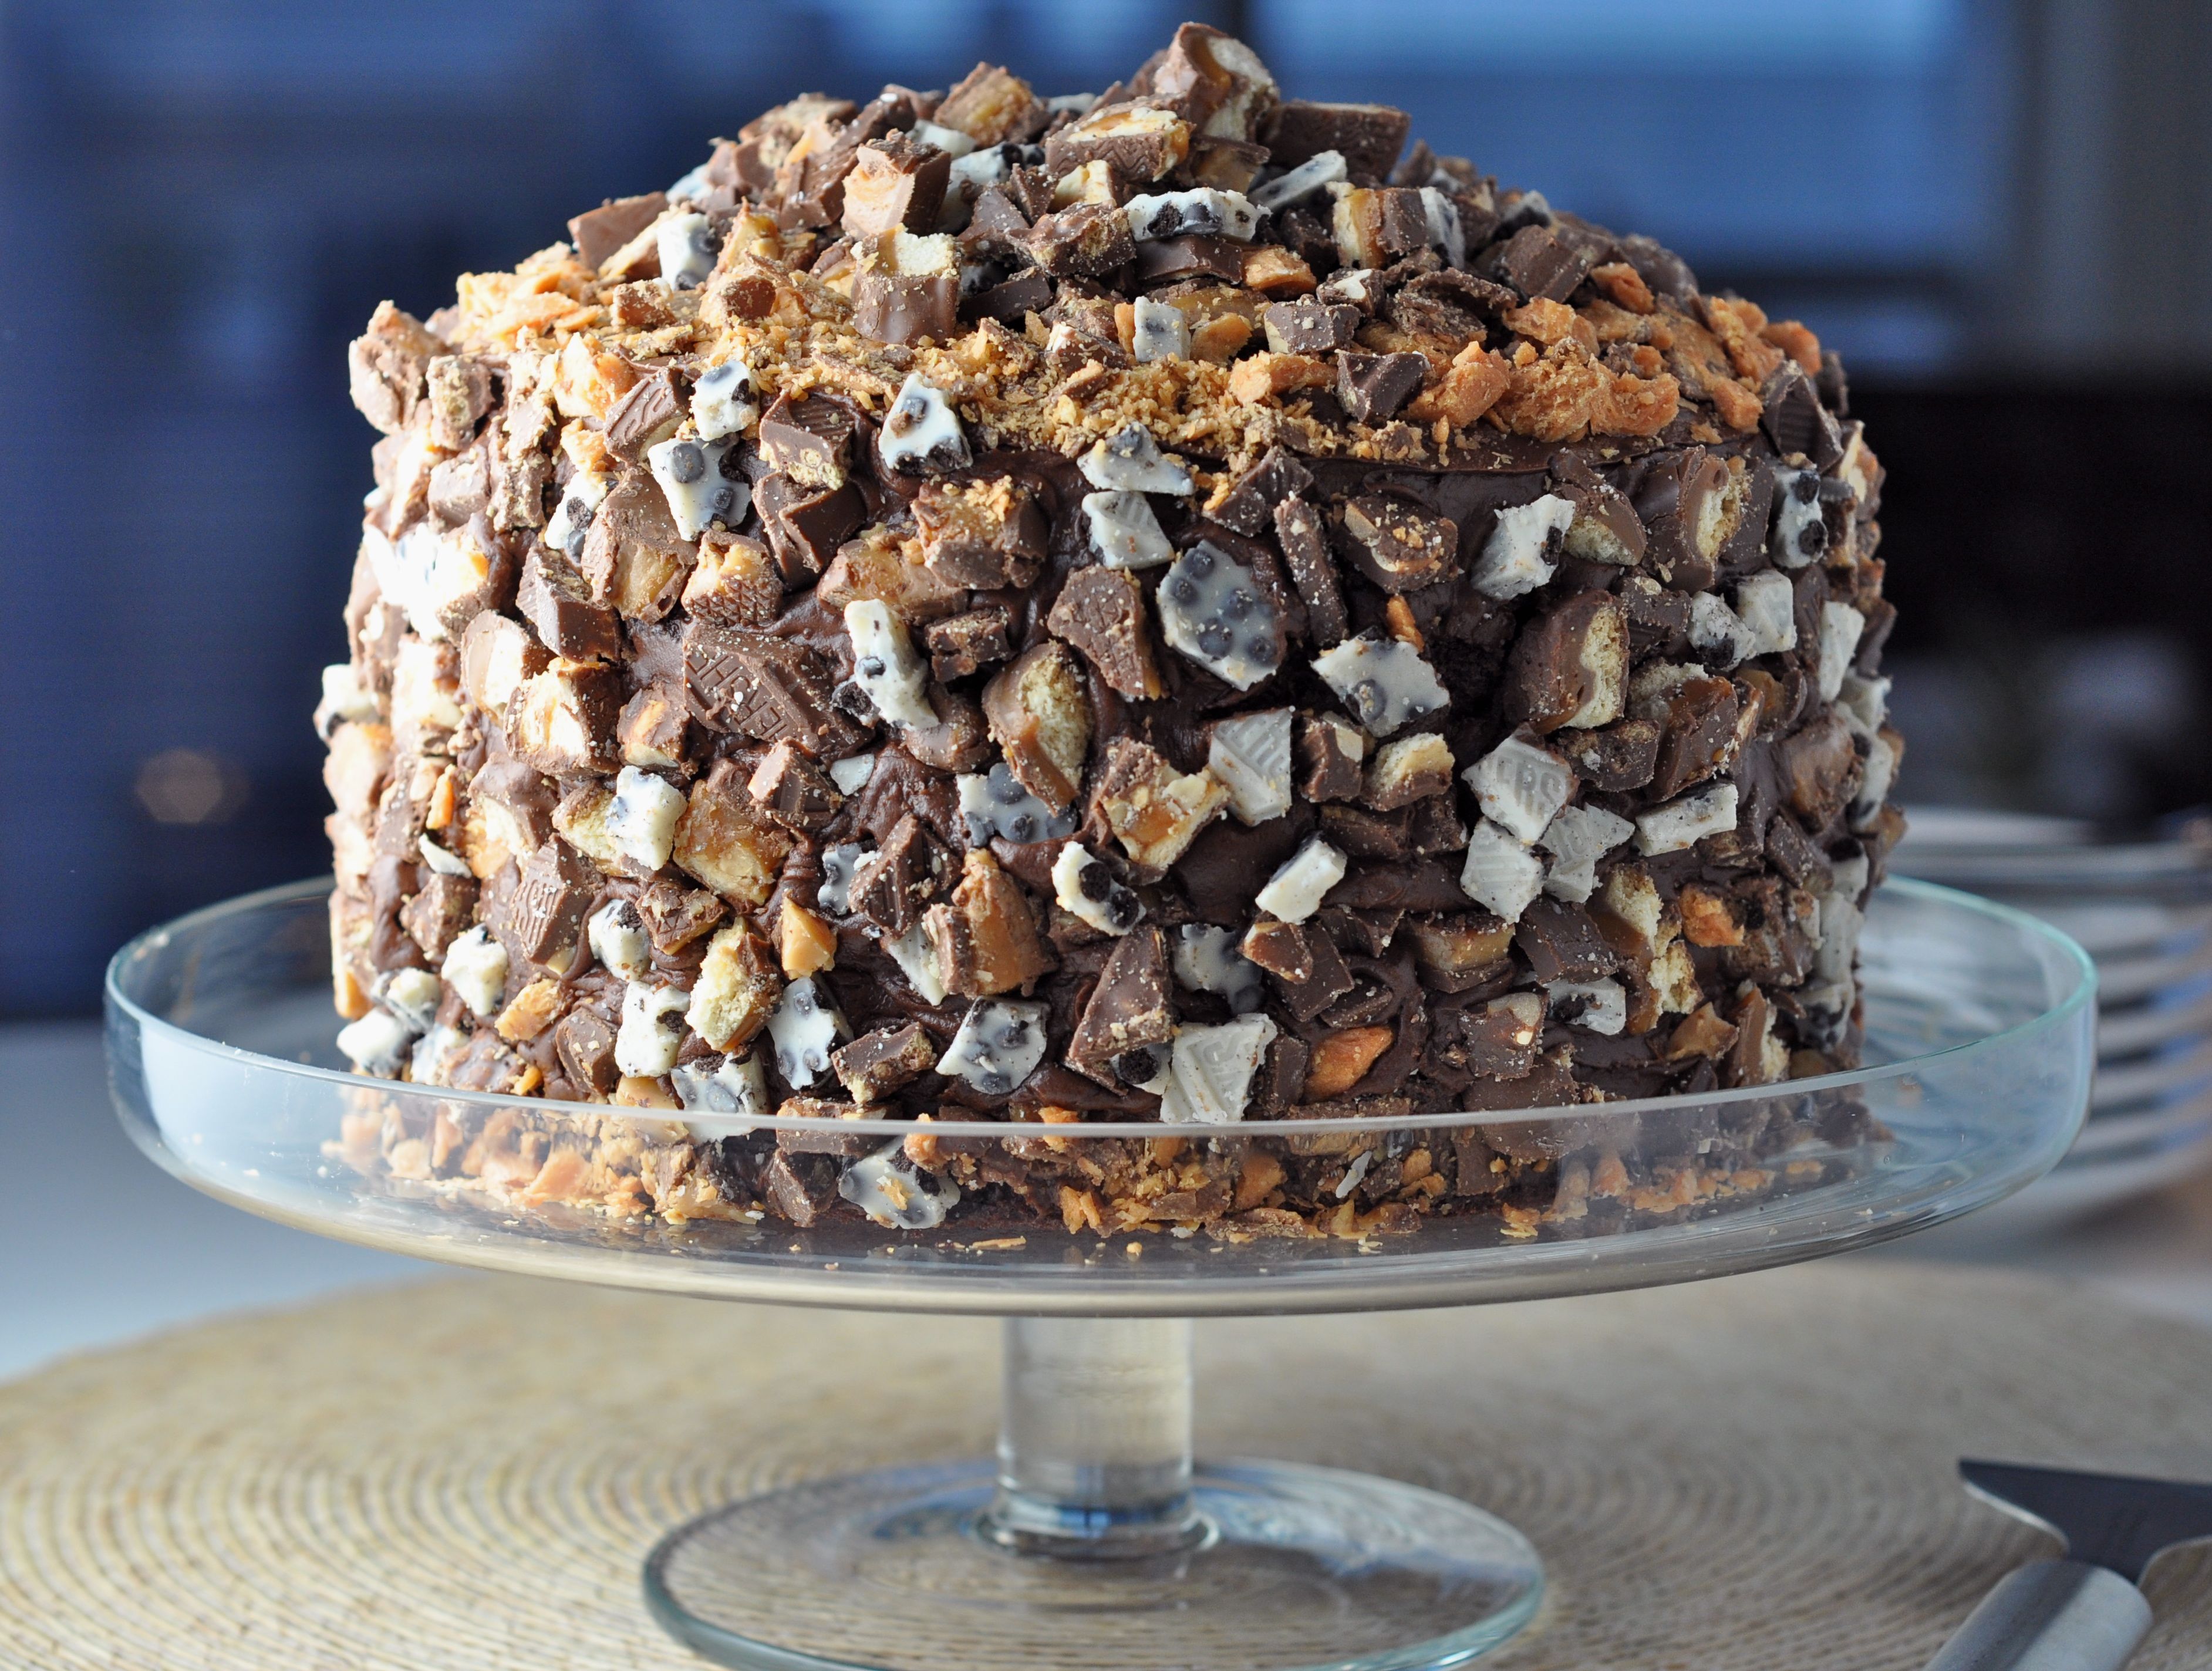
This Cake is Not a Mirage.
World’s Greatest Brownie Kitchen Towel for Purchase!


The Bingeworthy Brownie…