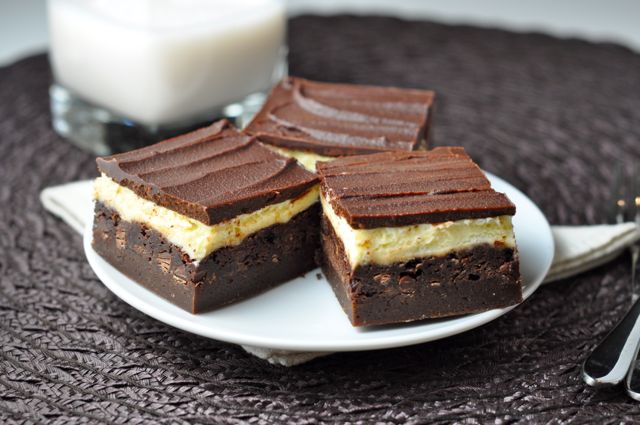
4 Layer Insanity Bars
-
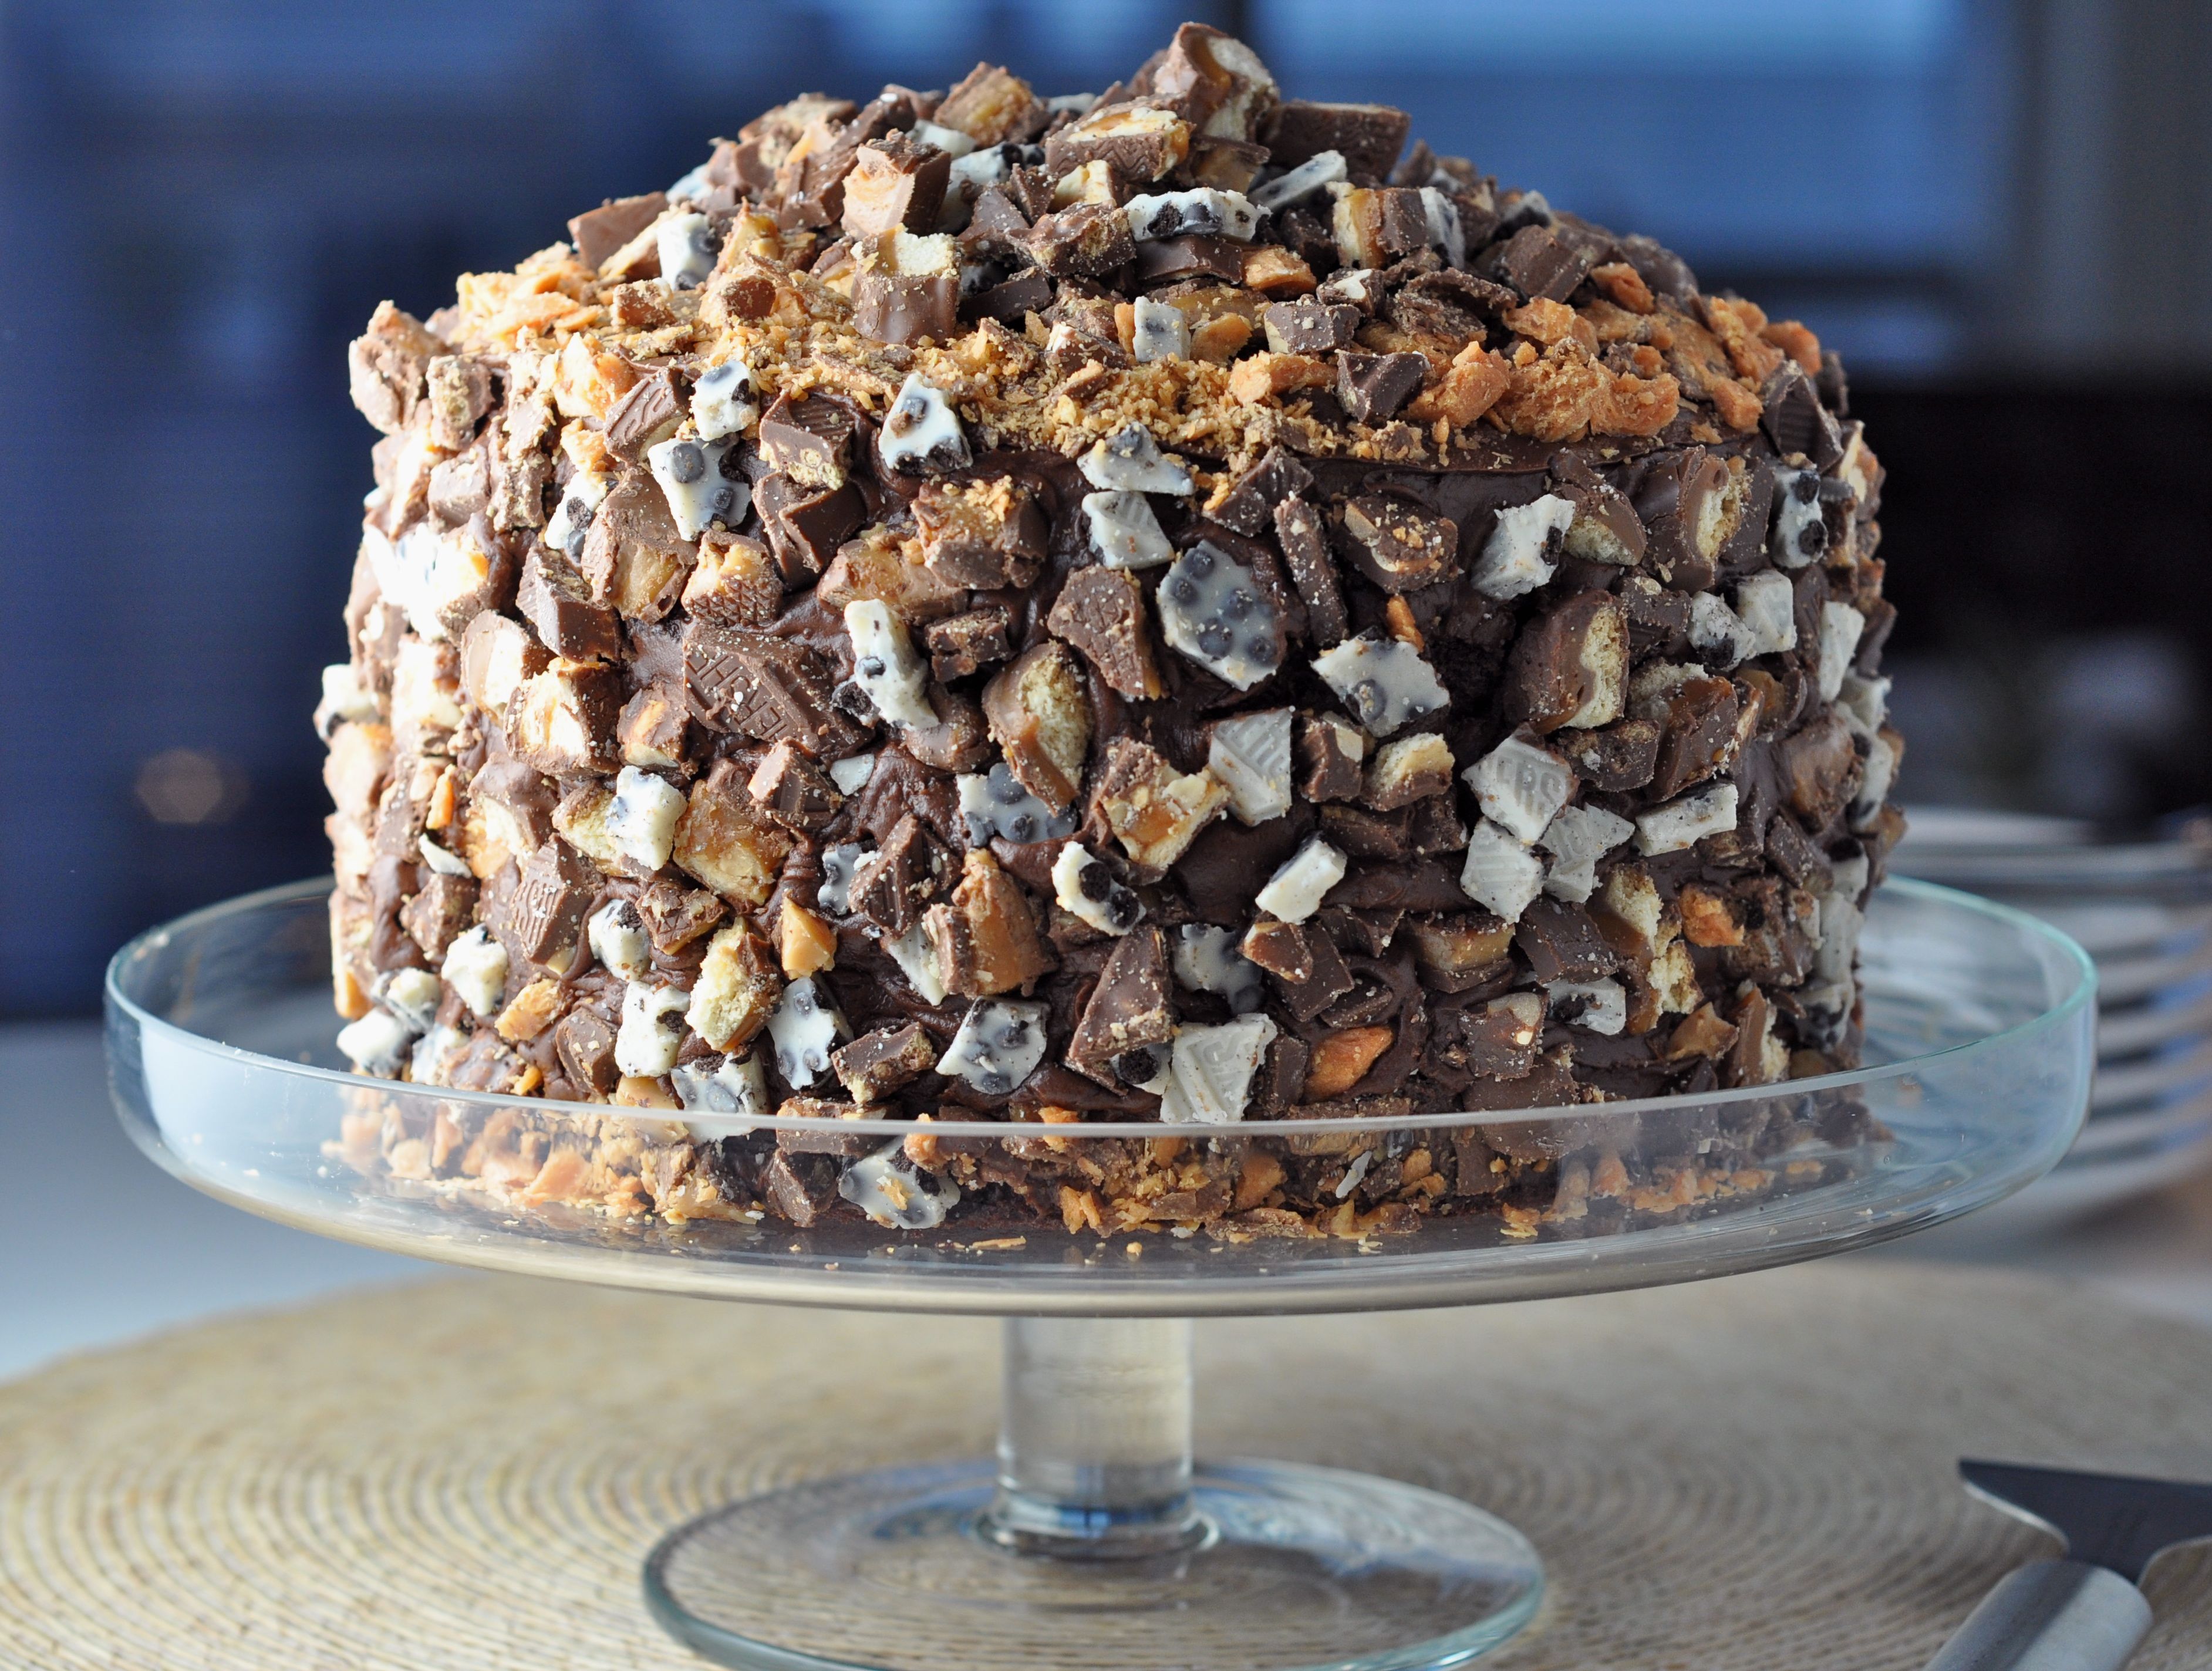
I have never made anything more decadent (oh, except for the Astonishing Chocolate Bar Cake which required the sprinkling of 14 chopped up bars overtop of multiple layers of chocolate cake. Yeah, that was pretty decadent.). But this, this dessert. There are four layers of dessert going on, four layers of love. Four layers of insanity. I have never been more proud.
I have also never made a dessert that required more patience, because let’s be honest here… four separate desserts that require massive chilling (or freezing, which is even better) before layering the next layer of love on top takes Time (yes, capitalized and in italics), and we all think we don’t have any of that stuff left. Use this recipe as a character-building exercise. Make one layer, freeze it, and let a day or so go by (or even a week if you’re really up for the challenge). When it all comes together and you’re ready to serve the bars, you’ll actually appreciate how much time it took to put together. (Plus, you can impress people by telling them that it took you like a week or a month to make.) Sounds insane, I know.
Picture how mind-blowing this baking experience is going to be for you:
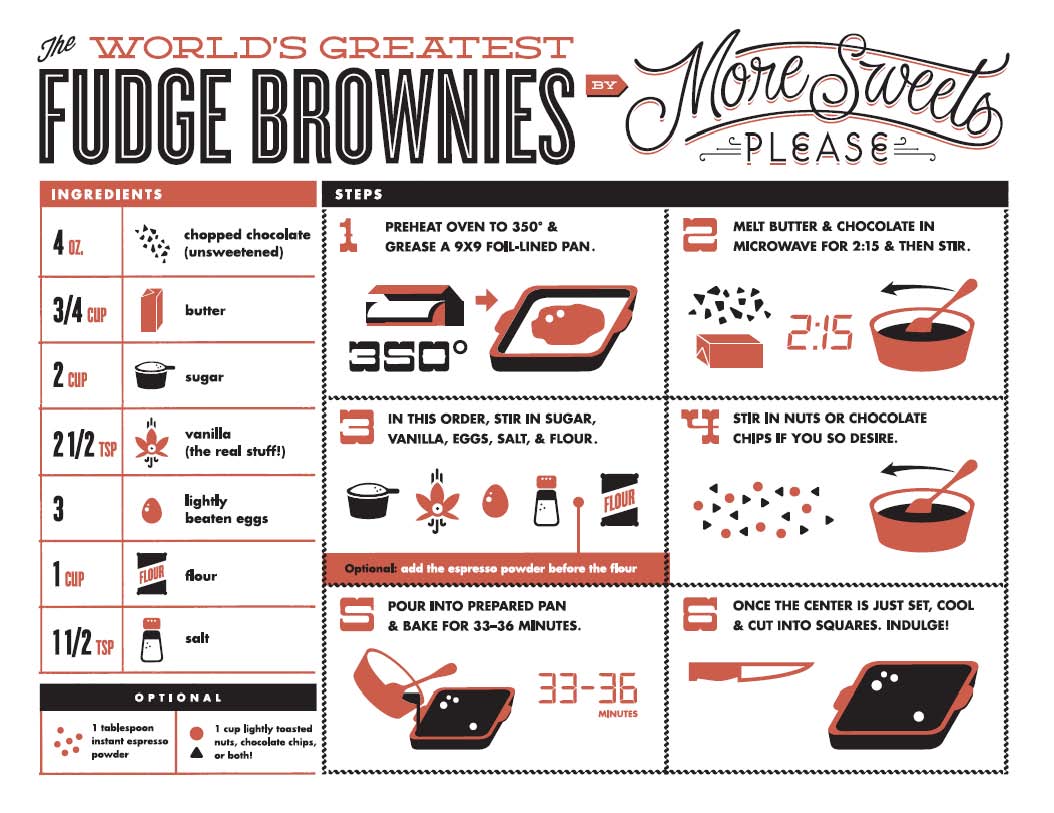
Layer # 1- The Base: The World’s Greatest Fudge Brownie. (Enough said, I know. Move on to layer # 2 because it’s obvious the brownie base sets any bar up for total and utter success. No convincicating needed.)
Layer # 2: Chocolatey chocolate chip cookie. (Yes. Imagine taking a layer of cookie dough, spreading it out over the brownie base, and baking it until soft on the inside and just barely crispy on the outside and at the corners. You could stop here and have an incredible bar, but no, more insanity needs to happen.)
Layer # 3: Cheesecake. (Right. You could die and go to heaven with just these three layers, but you need to buck up and wait for the fourth and final layer of sinsanity [get it? sin + insanity? fun, eh?].
Layer # 4- The Topping: Ganache. (Rich, creamy ganache. No other topping crossed my mind to crown this bar, and you’ll agree when you make it.)
(Oh- be careful when cutting this work of art… so you don’t end up making this mistake, okay?)
In summation: the process of making these bars might be crazy-making, but the finished product will be worth it. That’s why they’re called Insane.
Adapted from my World’s Greatest Fudge Brownie, Double Chocolate Buttermilk Cookie, and Strawberry Mini Cheesecake recipes…
LAYER # 1: THE BROWNIE BASE
4 ounces chopped unsweetened chocolate
3/4 cup unsalted butter
2 cups sugar
2 1/2 teaspoons real vanilla
3 lightly beaten eggs
1 cup flour
1 1/2 teaspoons salt
Optional: 1 tablespoon instant espresso powder
Optional: 1 cup lightly toasted nuts
LAYER # 2: THE COOKIE
1 cup all purpose flour
1/4 tsp baking soda
1/4 tsp salt
1/4 cup butter
1/4 cup plus 2 tablespoons cocoa powder
1 cups confectioners’ sugar
1 tsp vanilla
1/3 cup buttermilk
1 cup chocolate chips
LAYER # 3: THE CHEESECAKE
1 (8 ounce) package cream cheese, room temperature
3 tablespoons sweetened condensed milk
1 egg
3/4 teaspoon vanilla extract
LAYER # 4: THE GANACHE TOPPING
3/4 cup whipping/heavy cream
3/4 cup plus 1 tablespoon semisweet chocolate chips
- LAYER # 1: THE BROWNIE BASE
- Preheat oven to 350° and grease a 9 x 13″ foil-lined pan.
- Melt chocolate & butter in microwave for 2:15 minutes and stir.
- Stir in sugar, then vanilla, then eggs, then salt, espresso powder (optional), flour, and nuts (optional).
- Pour 3/4 of the batter into prepared pan and bake for 15 minutes (reserve the batter for another purpose- see tips below). Allow to cool on cooling rack and freeze or chill in fridge until very cold and set (overnight).
- LAYER # 2: THE COOKIE
- Preheat oven to 350°.
- In a medium bowl, whisk together flour, baking soda and salt.
- In a large bowl, melt the butter (for 20-30 seconds or so in the microwave on low power) and then whisk in cocoa powder until smooth. Whisk in sugar, vanilla and buttermilk, then stir in the flour mixture until well combined. Stir in the chocolate chips.
- Lightly grease sides of prepared pan (with brownie base already partially baked and frozen into bottom of pan). Spread dough evenly over brownie Layer # 1, and bake for 15 minutes. Allow pan to cool on a cooling rack and freeze or chill in fridge until very cold and set (overnight).
- LAYER # 3: THE CHEESECAKE
- Preheat oven to 300°.
- In a medium bowl, beat cream cheese until smooth. Gradually add sweetened condensed milk and beat well. Beat in egg and vanilla on medium speed until smooth.
- Lightly grease sides of prepared pan (with brownie base & cookie layer already partially baked and frozen into bottom of pan). Spread cheesecake filling evenly over frozen (or well chilled) cookie/brownie layers, and bake for 15 minutes (or until cheesecake appears just set in middle). Remove from oven and allow to cool on a cooling rack to room temperature.
- LAYER # 4: THE GANACHE
- Place chocolate in a large, heat-proof bowl. In a small saucepan, heat cream over medium-high heat until just about to boil, then pour over chocolate. Allow to sit for 5 minutes, then whisk until smooth. Allow bowl to cool on a cooling rack for about 30 minutes (until no longer too warm to the touch).
- Spread evenly over top of room temperature cheesecake/cookie/brownie layers. Allow ganache to set at room temperature (will take a couple of hours).
- Refrigerate for about 30 minutes prior to cutting into bars*; store in fridge but eat at room temperature.
Tips:
- Why so much time between each layer? Each layer has to set and chill in order to evenly spread the top layer effectively (imagine spreading cookie dough over a partially-baked brownie that was still warmish- the brownie would crumble all to heck). Ideally each layer will be frozen when spreading the layers overtop because it helps prevent that layer from over baking as well.
- Wondering what to do with the extra brownie batter? (First off, I didn’t modify the amounts in the brownie recipe to reduce by a quarter because it’s kind of hard to take 3 eggs and divide by 4, if you know what I mean. If you don’t know what I mean then it doesn’t really matter- just keep reading.) Trust me, you’ll make use of the batter either by making the W.G.F. Cookie, or pouring the remnants into ramekins and baking for about 20 minutes and then eating all by yourself.
- *Cutting the bars… about that. So you’ll want to NOT rush to chill the bars after spreading the ganache, because it will stiffen and then crack when you go to cut the bars. Better to have a soft topping than a crunchy one. Also, make sure the cheesecake layer is at room temperature before spreading the ganache on top of it. Tip: rinse your knife with hot water & dry it in between each slice when cutting the bars. (They will look neater.)
- Check out each individual post for more tips on how to make the best brownie, cookie & cheesecake.
- Make yourself a lot of stiff drinks while making these layers, as you’ll want to numb the impatience that naturally comes with making a treat that takes a huge chunk of time out of your life.
- Enjoy!
Related Recipes & Posts:
- LAYER # 1: THE BROWNIE BASE
Leave a Reply

World’s Greatest Brownie Apron- Buy Me Instantly!

More Sweets, Please!
This Cake is Not a Mirage.
World’s Greatest Brownie Kitchen Towel for Purchase!


The Bingeworthy Brownie…